
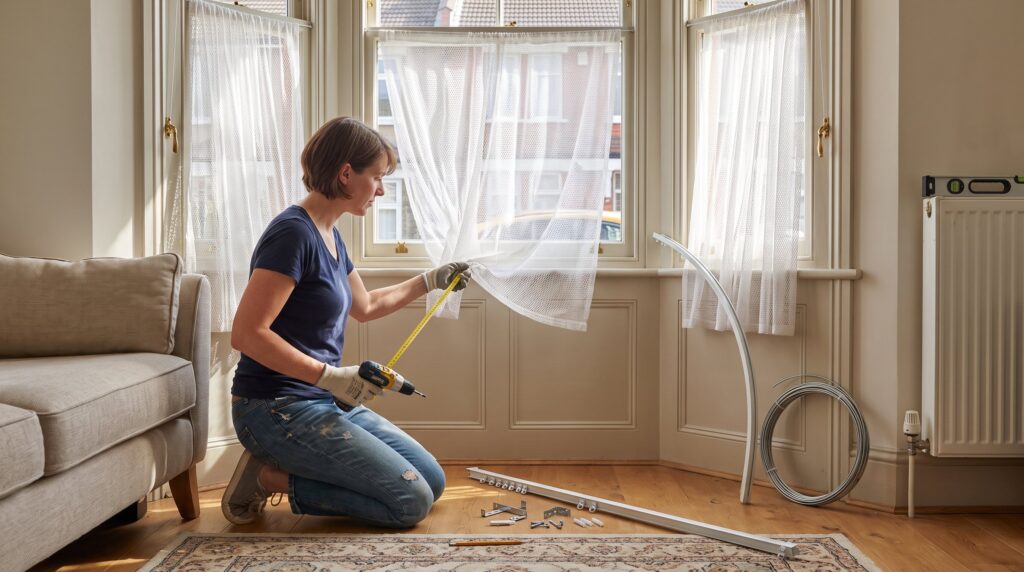
How to Fit Net Curtains on Bay Windows starts with a clear plan: measure each bay panel, choose a suitable track or wire, and place brackets where they will carry weight without catching. This guide gives practical steps and realistic warnings so a handy homeowner or renter can install nets confidently. It focuses on common angled bays, tells when to use curved tracks or slim wires, and flags typical mistakes to avoid.
Key Takeaways
- Fitting net curtains on bay windows starts with precise measurement of each bay panel to ensure an accurate fit.
- Choose the appropriate track system—wire, slim track, or light poles—based on the net curtain weight and bay window angle.
- Plan bracket placement carefully with extra support near bends to prevent sagging and ensure smooth curtain movement.
- Use proper fixings matched to the wall material for secure installation and maintain even spacing for stability.
- After installation, test curtain operation thoroughly and perform regular maintenance like cleaning tracks and adjusting gliders to prolong performance.
- Following these steps confidently optimizes the fit and appearance of net curtains specifically designed for bay windows.
Plan Your Installation: Assess The Bay Window And Curtains
Fact: Successful installs begin with a site survey. Before cutting or drilling, stand back and visualise the finished curtain line. Note whether the bay is shallow or deep, whether the frame is timber or uPVC, and if sill‑length nets or below‑sill nets suit the room.
Measure recess depth and check for obstructions: window handles, casement stays, and radiators that might block a hanging net. Decide mounting type early, wall or ceiling, because this changes bracket length and the track profile needed. A ceiling mount clears a shallow sill but needs longer fixings: a wall mount gives a softer profile and often easier curtain access.
Practical warning: don’t assume a pre‑cut track will fit, most bays require joining or bending. Lay out your chosen track, pole, or wire on the floor in front of the window to visualise where brackets fall. That small rehearsal catches mistakes early and prevents wasted holes.
Measure Accurately: Widths, Returns, And Mounting Heights
Answer: Measure each bay section separately and record three numbers: width of front, width of each return, and desired drop height.
Measure widths at three points, top, middle, bottom, and use the smallest figure to avoid rubbing. Add the widths of the front and both returns to get total track length. For mounting height, measure from the top of the frame to where the curtain should finish: typical header placement is 8–16 cm above the frame to clear handles. For a sill drop, subtract the sill depth from the desired net length.
Concrete tip: when measuring for a continuous track, add 10–20 mm at each end for the track’s overlap and end stops. If planning ceiling mounts, measure from ceiling to desired hem. If unsure about stretch or shrinkage of fabric, check the fabric supplier’s tolerance or consult a fitting guide like the site’s detailed resource on net curtains for technique and fabric behaviour: further reading.
Choose The Right Track, Pole Or Wire And Fixings
Insight: Choose the lightest, stiffest system that suits the net weight and bay shape. Net curtain fabric is light, so heavy curtain poles are usually unnecessary. Options fall into three practical groups: slim wire, slim track, and light poles with bay kits.
Net wires suit ultralight nets and give a near‑invisible look. They require eyelets or small hooks and usually tensioning screws to prevent sag. Slim PVC or metal tracks are most versatile for bays: they support gliders and run rings smoothly and can be pre‑curved or bent on site. Light curtain poles work when the design requires a rod look, pick bay kits with corner joins and check bracket centres.
Fixings: match screw type to wall material. Use plastic plugs for solid brick, wall anchors for plasterboard, and long coach screws for timber. When in doubt, choose a longer, heavier fixing and add one extra bracket on long runs.
Track Types And When To Use Them (Curved, Flexible, Or Straight)
Fact: track choice determines fit quality. Flexible PVC tracks bend around gentle bays and allow quick reshaping with fingers. Curved metal tracks offer a cleaner curve for sharper angles but need careful bending at marked points. Straight tracks plus corner joints suit segmented bays where you want defined panels.
Practical examples: for a 3-panel bay with 45° returns, a pre‑curved metal track makes the smoothest travel and avoids wrinkling: for a subtle 15° return, flexible PVC bent gradually is faster and cheaper. If smooth glide is critical (for frequent opening), choose a track rated for gliders and add extra brackets around each bend to prevent sagging.
Warning: aggressive bending of some metal tracks can weaken them: mark bends, bend slowly, and follow manufacturer instructions.
Step-By-Step Installation: Marking, Drilling, And Fitting The Track
Conclusion: Install methodically, measure, mark, pilot, and then secure. Start by transferring the bracket spacing from your laid‑out track to the wall or ceiling with a pencil. Use a spirit level to keep the line straight: for long runs, chalk lines reduce cumulative error.
Mark bracket centres about 30–45 cm apart and within 10 cm of each corner or bend. Drill appropriate pilot holes and insert matched wall plugs. Screw brackets in but leave screws slightly loose so you can fine‑adjust alignment before fully tightening. Clip or screw the track into the brackets and lock each clip as you go.
Load the gliders or rings before final end stops are fitted. Slide nets in using heading tape or hooks at roughly 8 cm intervals to spread weight evenly. Test travel before trimming excess fabric.
Fitting Curved Or Multi-Panel Tracks On Angled Bays
Key point: bend gradually and support each bend with extra brackets. For curved tracks, mark the pivot points inside each panel first. Bend the track at those marks, then trial‑fit it across the bay without fixings to check the curve.
When fitting multi‑panel tracks, join straight sections with supplied connectors and use a bracket either side of each connector to prevent movement. For each internal corner, add a bracket within 5–10 cm of the bend to stop the track dipping and catching the net. If the track drags, loosen adjacent brackets, nudge the track, and re‑tighten.
Real lesson learned: a homeowner fitted a curved track without extra brackets and found a 6 cm mid‑span sag after hanging nets. Adding two brackets either side of the bend corrected the sag and restored smooth travel.
Finishing Touches, Common Problems And Ongoing Maintenance
Fact: small adjustments after fitting save hours of frustration. After hanging nets, walk the track and open/close the curtains several times. Watch for catches at joins, uneven pleats from uneven glider spacing, and sagging between brackets.
Common fixes: move a bracket 5–10 cm to remove a rub point: replace a worn glider if the net snags: add a tensioner to a wire to remove slack. Clean tracks every 6–12 months by vacuuming the groove and wiping with a damp cloth: lubricate gliders sparingly with a dry silicone spray when they stick.
Practical links: for more on measuring windows and choosing fabric that behaves well on tracks, consult the site’s detailed pages about measuring windows and choosing fabric. Honest assessment: light nets are forgiving, but multisection bays demand patience, expect a two‑hour install for an average three‑panel bay, longer if bending or extra brackets are needed.