
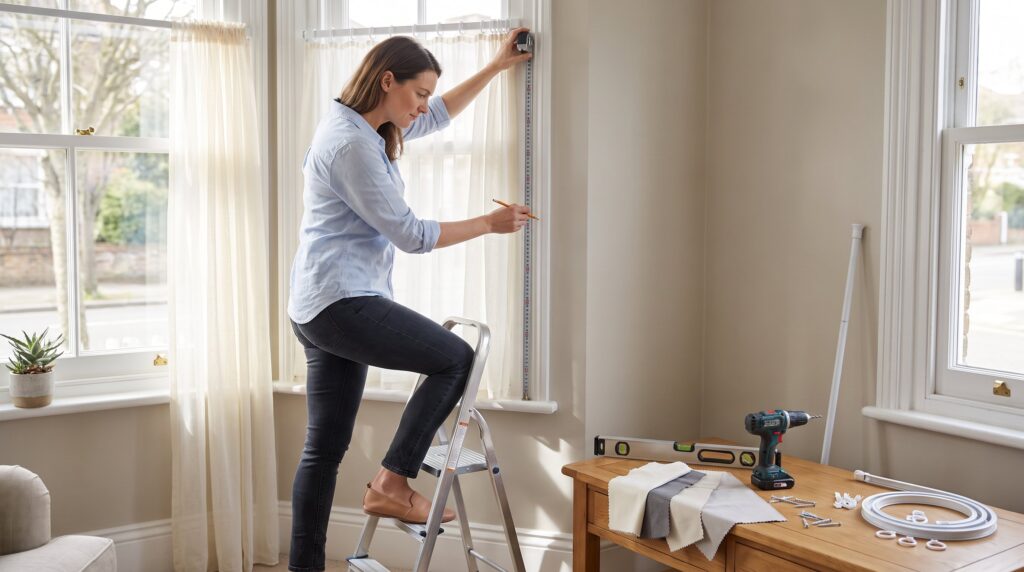
How to Hang Net Curtains Correctly starts with one clear rule: measure first, choose hardware second. This guide gives hands‑on, practical steps for selecting net or voile fabric, picking the right rod or track, and fitting the curtain so it hangs evenly and functions well. It assumes ordinary home windows and common tools. Readers will learn how to avoid common mistakes, crooked hems, flat gathers, and poorly placed poles, so the finished result looks intentional and lasts longer.
Key Takeaways
- To hang net curtains correctly, always measure the window recess in multiple places and use the shortest width to ensure a proper fit.
- Select net curtain fabric density based on light and privacy needs, with lighter voile for daylight diffusion and denser nets for privacy.
- Choose hardware that matches the fabric weight and room use: tension rods for light nets and tracks or poles for heavier voiles to ensure smooth operation and durability.
- Calculate fabric width by multiplying the window recess by 2 for standard gathers or 3 for extra fullness and privacy to avoid flat or baggy curtains.
- Install poles or tracks 15 cm above the window frame and allow side overlaps to visually lift the window and let light in effectively.
- Check for obstacles like window handles before installation to prevent snagging and use a spirit level when mounting tracks for an even curtain hang and smooth movement.
Choosing The Right Net Curtains And Hardware
Fact first: pick fabric density to match light and privacy needs. Lighter voile lets daylight diffuse: denser net gives privacy. For a standard room where daylight matters, select a net that still shows a faint silhouette at arm’s length. For a bedroom or street‑facing window, choose a fabric with tighter weave.
When deciding fullness, use a clear ratio: 2× window width for normal gather, 3× for extra privacy and a plush look. For example, a 120 cm recess becomes 240 cm fabric at 2× or 360 cm at 3×. This simple multiplication prevents flat, baggy curtains.
Hardware choices change the hanging method and the curtain’s behaviour. Tension rods are spring‑loaded and suit light nets in shallow recesses: they avoid drilling. Net rods or thin cables fixed with screws and eyelets suit café‑style nets and slim profiles. Tracks or poles mounted above the frame allow smoother drawing and support heavier voiles. Each option has a trade‑off: tension rods are quick but may sag over time: tracks cost more but distribute weight evenly.
Practical detail: match the curtain heading to the hardware. Rod pockets work with tension rods: heading tape or hook eyes pair with tracks. Rings or clip hooks work on poles. If a room will be used for sleep or privacy, choose denser net and a pole or track that supports 3× fullness so the fabric never pulls flat.
Lesson learned (vulnerable moment): one installer thought a single 2× width would look full on a tall sash: it looked skimpy. Adding a second panel to reach 3× fixed the problem and made the window feel intentionally dressed.
Further reading on fabric choices is useful for someone who wants specifics on weave and weight: see the article about curtain fabric selection for detailed guidance: net curtain fabrics.
Measuring And Preparing Your Window For Installation
Answer up front: measure the recess and drop precisely, then use the shortest width measurement. Accurate measurements prevent ill‑fitting curtains.
Measure three points across the inside of the frame, left, middle, right, and record the shortest as the recess width. This compensates for frames that are not perfectly square. For drop, measure from the intended rod or track position down to where the curtain should end: sill, below sill, or floor. For a sill length, aim for 1–2 cm above the sill to avoid catching dust: for a floor length, target 1 cm clearance to prevent dragging.
If installing a pole or track above the frame, add 30–40 cm to the window width to allow overlap and side clearance. Position the pole roughly 15 cm above the frame: this lifts the visual height of the window and lets light sit higher in the room. For side overlap, plan 15–20 cm each side so the net clears the glass fully when open.
Use the measured recess width to calculate fabric: multiply by 2 for standard gather, or by 3 for extra privacy. Example: a 100 cm recess needs 200 cm fabric at 2× or 300 cm at 3×. Mark these figures on the fabric order or cutting list to avoid last‑minute reorders.
Tools checklist: metal tape measure, pencil, spirit level, and a step ladder. If drilling into masonry, use a masonry bit and wall plugs sized to the screw head. For timber frames, pilot holes reduce splitting.
Installers often forget to check for obstructions, window handles, locks, or external reveals can alter ideal pole placement. Measure clearance with the handle in both closed and open positions so the net won’t snag. For a practical primer covering measurement methods and templates, consult the step‑by‑step measuring guide: window measuring guide. Also, a broad background reference on nets and technique helps put these measurements in context: complete guide reference.
Step‑By‑Step Hanging Methods: Tension Rods, Tracks, And Rings
Clear summary first: choose the hanging method that suits the fabric weight and the room’s use, tension rods for light nets, tracks for heavier voiles, rings for poles and decorative draws.
Tension rods, quick and no‑drill
- Prepare: extend the rod about 1–2 cm wider than the recess. This extra compression keeps the rod wedged firmly. If the rod has rubber end caps, press them against the frame for grip.
- Hang: thread the net through the rod pocket or slide it over the rod. Centre the panel and adjust gathers so folds fall evenly. For wider windows use two rods joined by a small overlap or choose a telescopic design rated for the length.
- Tip: if sag appears after a week, rotate the rod to increase spring tension or switch to a support bracket.
Tracks, smooth operation for heavier nets
- Prepare: fix the track above the window at the measured height. Use a spirit level so the track runs perfectly straight: even small slopes make nets draw oddly.
- Fit gliders: push gliders into the track at equal spacing. Attach hooks or tapes to the top of the nets (heading tape is common) and clip each hook to a glider.
- Test: draw the curtain fully open and closed two times to check for sticking points. Lubricate the track with a silicone spray if movement feels heavy.
Rings on poles / net rods, visual detail and simple repairs
- Prepare: slide rings onto the pole and space them roughly 10–15 cm apart depending on fabric weight. Heavier fabric needs closer spacing.
- Attach: use small curtain hooks or clips to fix the net to each ring. Ensure the first and last hooks are set so the curtain covers the glass when closed.
- Adjust: level the skirt by raising or lowering individual hooks if one side hangs lower. Rings make this fine‑tuning easy.
Common mistakes and fixes
- Mistake: ordering fabric to the exact recess width. Fix: add 2× or 3× fullness before cutting.
- Mistake: mounting track unevenly. Fix: remove, plane screw positions, and re‑level.
- Mistake: choosing a tension rod for a heavy voile. Fix: retrofit a slim track or add central support.
A useful related article explains maintaining privacy while keeping light: it helps decide fullness for bedrooms versus living rooms: privacy without losing light.
Conclusion
Key takeaway: accurate measurements, the right hardware, and 2–3× fabric fullness produce neat, functional net curtains. Measure the recess in several places, choose tension rods for light nets or tracks for heavier voile, and aim for even gathers. Small checks, level tracks, correct drop, and handle clearance, prevent most problems. With careful measuring and the correct mounting method, nets look intentional and perform reliably.